Want to get the kids in your life into scrolling? Grab some scrap wood and follow our easy instructions.
1. Prepare the wood. Sand the wood and remove the sawdust. Explain that it is easier to sand a large piece of wood than a small cut puzzle piece. Use your favorite method to attach a copy of the pattern to the wood. Explain that using blue painter’s tape on the wood or attaching the pattern to shelf paper makes the pattern easier to remove later and lubricates the saw blade to prevent scorched edges on the wood.
2. Prepare the saw. Show your student how to install the blade. Ask him/her to run a finger over the blade to check that the teeth face down (the blade should feel smooth on the way down and rough on the way up). Then, check that the blade is at a right angle to the saw table using a small metal square, a block of wood, or a plastic card. Adjust the tension of the blade so it moves no more than 1/8″ (3mm) from side to side. If you usually run your saw on a fast speed, turn it down. Finally, put on safety glasses and a dust mask.
3. Cut the perimeter of the puzzle. Demonstrate holding the wood lightly and steering the wood to the saw blade gently. Encourage your student to relax and let the blade do the cutting—don’t push too hard.
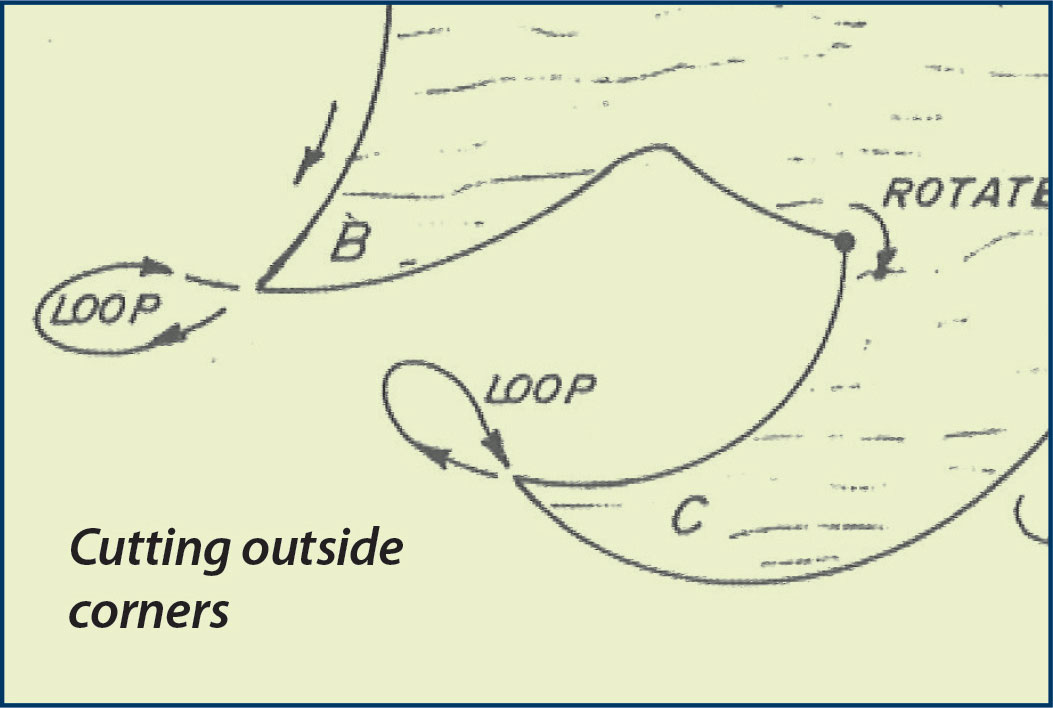 • Cutting outside corners (tips of cat’s ears): Show your student how to cut past the corner and loop around in the waste area to approach the next side of the pattern.
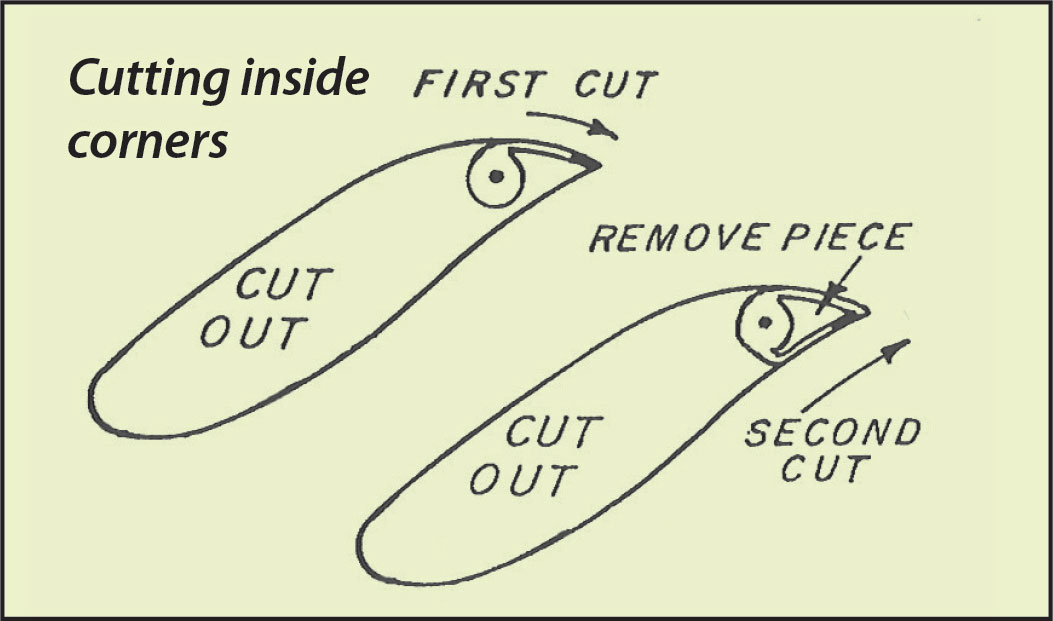
• Cutting inside corners (between dog’s tail and leg or cat’s front legs): Show your student how to cut up to the corner from one direction, back out, and cut up to the corner from the second direction. If necessary, make a third cut to remove the piece.
• Cutting detail lines (dog’s ear): Show your student how to follow the line, slow the saw, and back the blade out of the cut.
4. Cut the puzzle pieces. Once your student has cut the outside of the puzzle, have him/her cut along the center puzzle key line. Explain that when cutting a puzzle with more pieces, you should cut one piece at a time off the larger puzzle body, because you always want to hold the largest piece possible to make it easier to control the wood and to keep your fingers away from the blade. 5. Finish the puzzle. Remove the patterns, using mineral spirits if necessary to dissolve the adhesive. Tape sandpaper to the table or bench and rub the pieces on it to remove any fuzzies. Dunk the pieces in finish, such as Danish oil, if desired, and let dry. Ask your student to sign and date a puzzle piece, and congratulate him/her on a job well done!
Troubleshooting
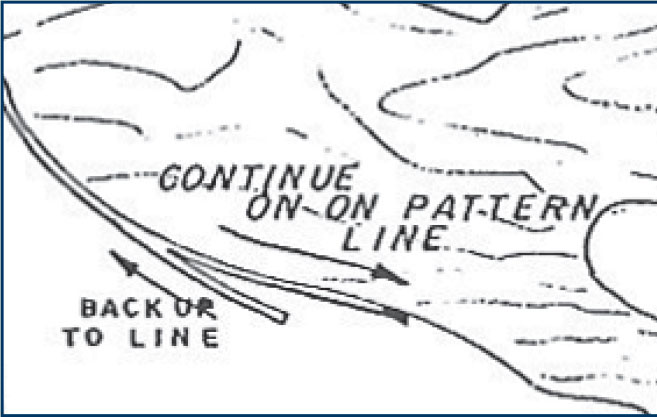
• Cutting away from the line into the waste: Back the blade to the place where it left the line and continue forward on the line.
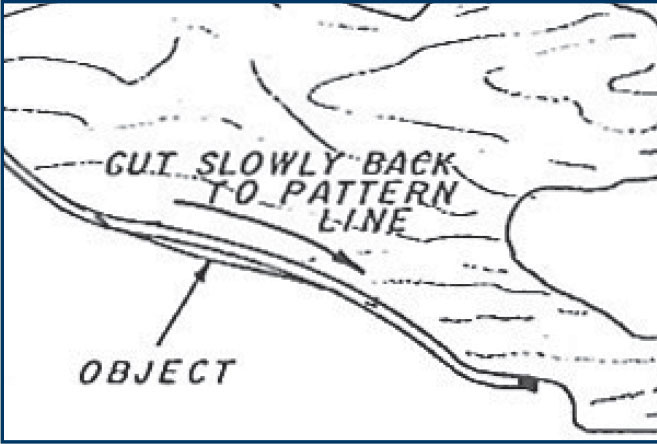
• Cutting away from the line into the project: Gradually taper the cut back to the line, making a gentle curve.
• Puzzle pieces fit one way but not the other: Either the blade wasn’t square to the table or the student pushed too hard and forced the blade out of alignment. Check that the blade is square, and consider tightening the tension a small amount. Encourage the student to relax and push gently, letting the saw do the work.

Further Reading: Scroll Saw Workbook by John A. Nelson
Materials & Tools:
Materials:
• Scrap wood, 1/2″ (13mm) thick
• Sandpaper
• Blue painter’s tape, shelf paper, and/or spray adhesive
• Danish oil (optional)
Tools:
• Blades: #5 reverse tooth
• Metal square, block of wood, or plastic card
• Safety glasses
• Dust mask